Mail Rules and Signatures
Automatically organize incoming mail and create reusable signatures for each email identity.
Mail Rules and Signatures
Each email identity in Kurrier has its own rules and signatures. Rules automatically process incoming messages, while signatures add consistent contact or branding information when you compose mail.
To manage either feature, open Mail, select the identity, and go to Settings.
Mail rules
Rules inspect incoming messages and apply one or more actions when the selected criteria match.
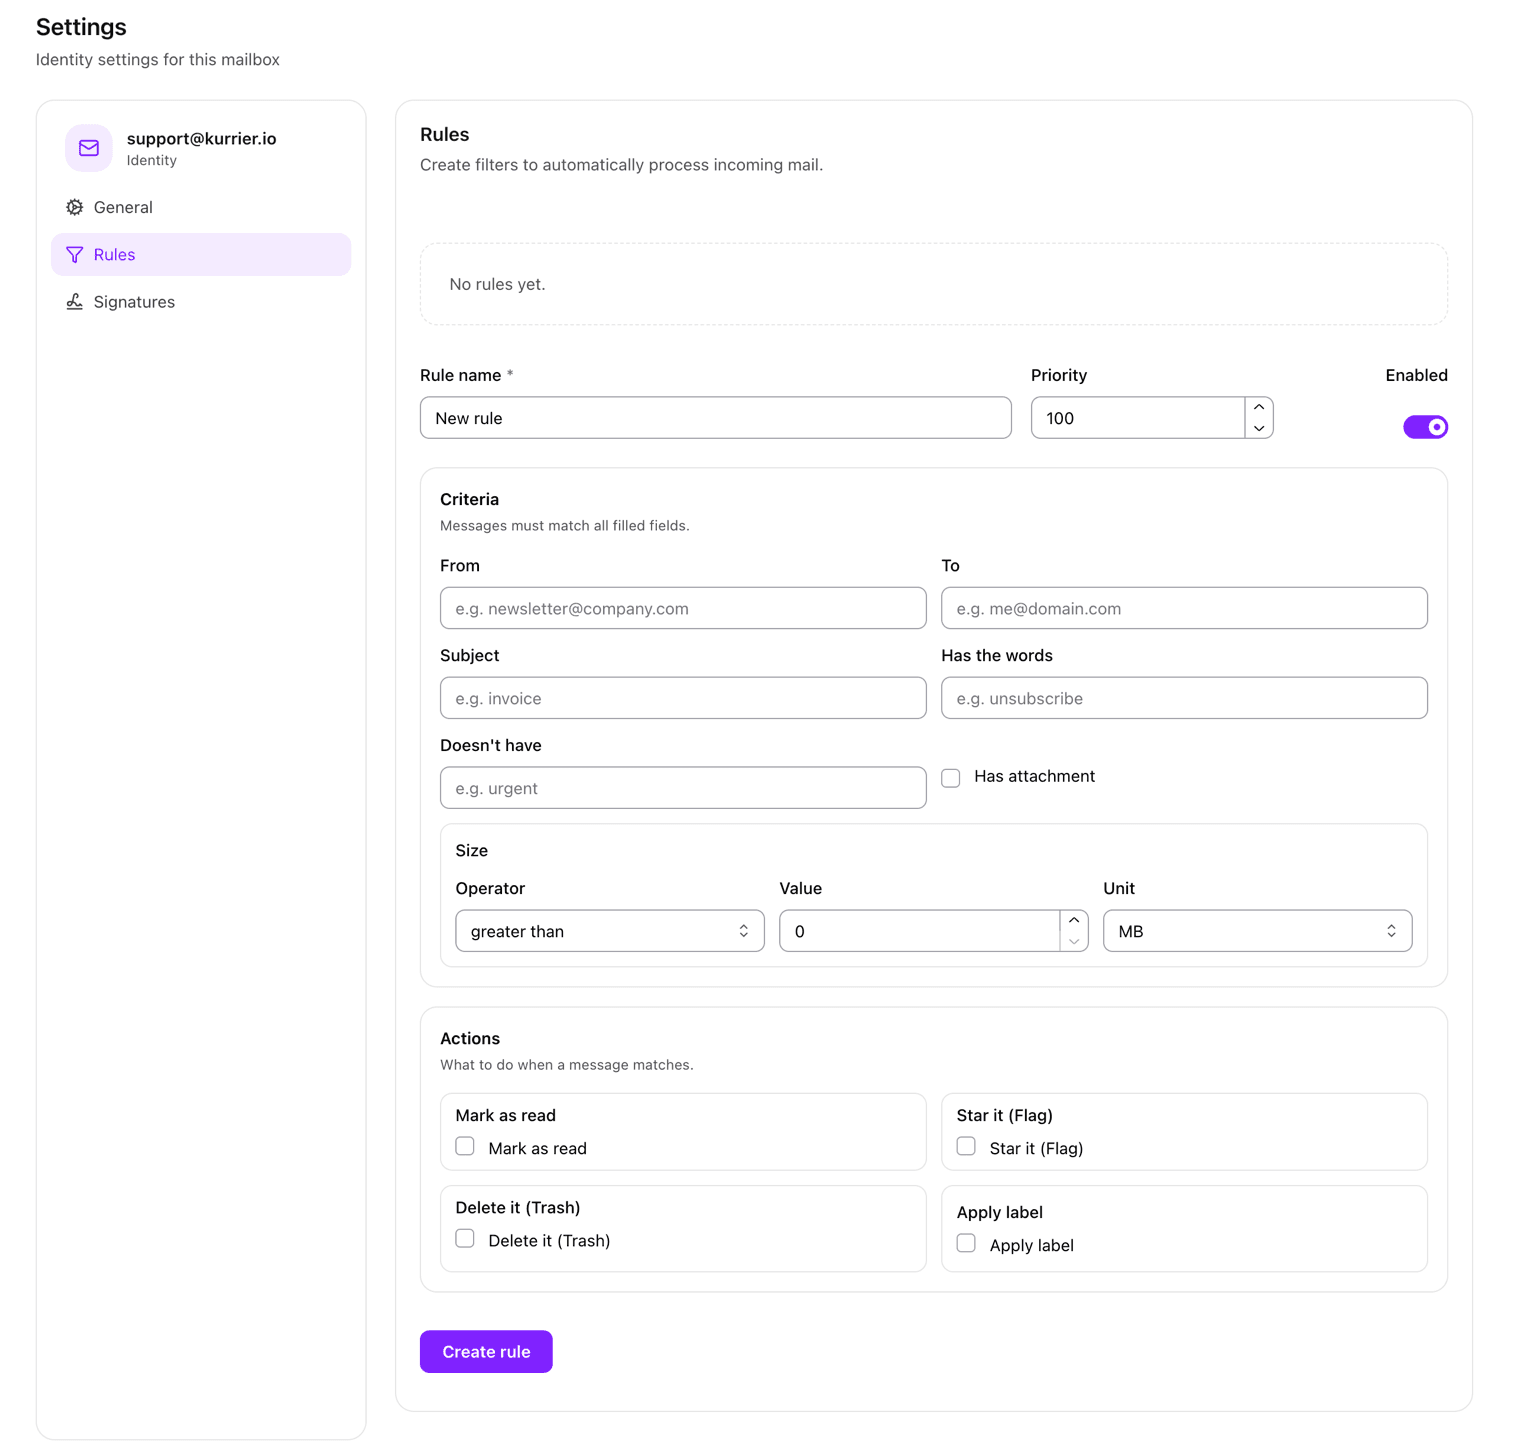
Create a rule
- Open Settings → Rules for the identity.
- Enter a descriptive rule name.
- Leave Enabled on if the rule should begin processing incoming mail immediately.
- Set a priority to control the rule's relative processing order.
- Add one or more criteria.
- Select at least one action.
- Select Create rule.
If you are unsure which priority to use, keep the default value.
Match messages
You can match incoming mail using:
- From — messages from a particular sender or address
- To — messages sent to a particular recipient address
- Subject — messages whose subject contains the entered value
- Has the words — messages containing specified text
- Doesn't have — messages that do not contain specified text
- Has attachment — messages with one or more attachments
- Size — messages greater than or less than a selected size
A message must match every criterion you fill in. Leave a field empty when it should not restrict the rule.
Choose actions
When a message matches, Kurrier can:
- Mark it as read
- Star or flag it
- Move it to Trash
- Apply a label
You can select more than one action for the same rule. For example, a newsletter rule can apply a label and mark the message as read.
Example: label invoices
Create a rule with:
- Rule name:
Invoices - Subject:
invoice - Has attachment: enabled
- Action: apply your
Invoiceslabel
This rule matches incoming messages only when both the subject and attachment conditions are satisfied.
Manage rules safely
- Use clear names so that each rule's purpose is easy to understand.
- Start with narrow criteria and broaden them only after checking the results.
- Be especially careful with Delete it (Trash).
- Disable a rule when troubleshooting instead of deleting it immediately.
- Review overlapping rules and their priorities if several actions affect the same mail.
Email signatures
Signatures are reusable blocks of content inserted below your message. You can create multiple signatures for an identity and choose different defaults for new messages and for replies or forwards.
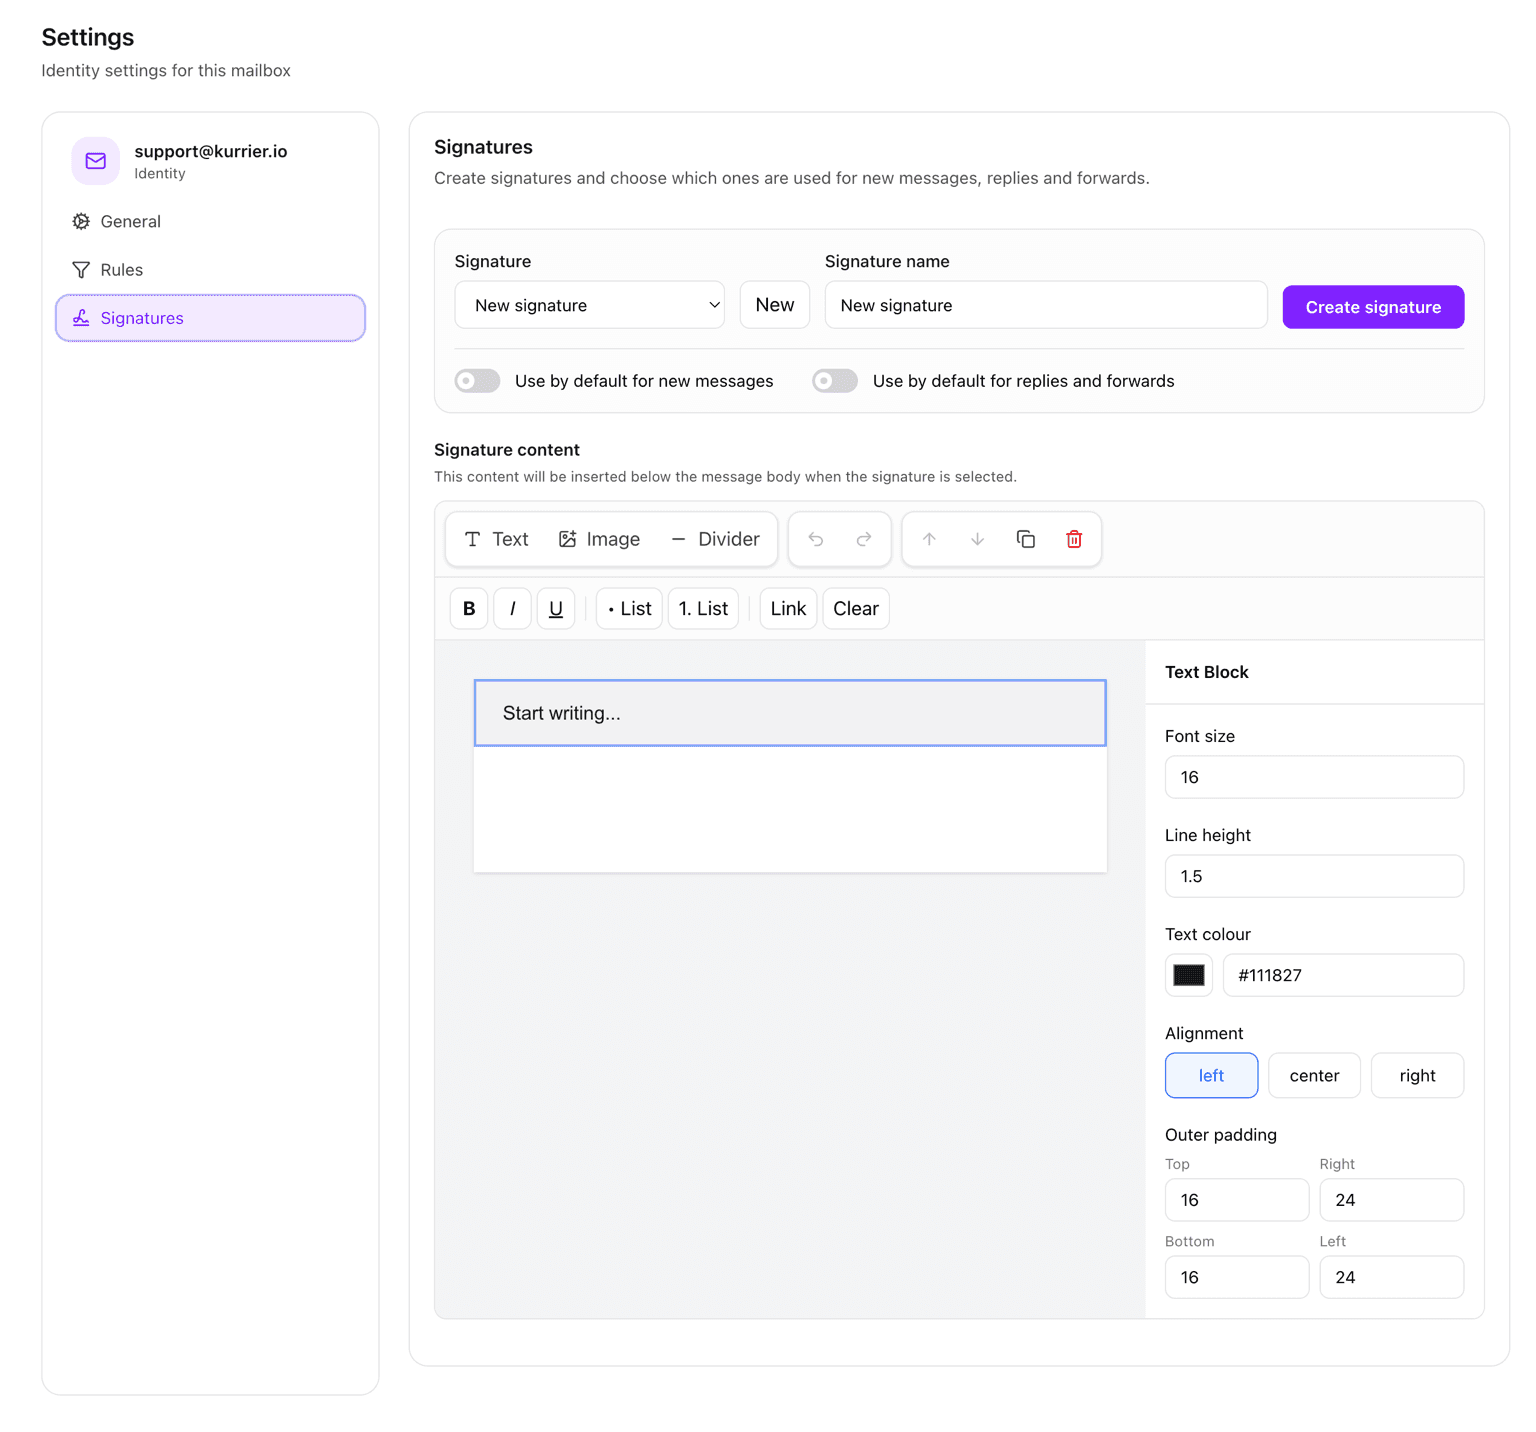
Create a signature
- Open Settings → Signatures for the identity.
- Select New signature.
- Enter a recognizable signature name.
- Select Create signature.
- Build the signature in the editor.
Useful names include Standard, Short reply, Support team, or Legal footer.
Build the signature
The signature editor supports reusable content blocks:
- Text for names, roles, contact details, disclaimers, and links
- Image for a logo, portrait, or other visual element
- Divider for separating sections
Select a block to edit its settings. Available controls depend on the block type and can include typography, text color, alignment, spacing, and padding.
For text blocks, you can also use bold, italic, underline, lists, numbered lists, and links.
Arrange content blocks
Use the editor toolbar to:
- Undo or redo a change
- Move the selected block up or down
- Duplicate a block
- Delete a block
Keep the layout relatively simple. Email clients render complex designs differently, while a compact signature with standard fonts and sensible image sizes is more reliable.
Choose default signatures
Each signature can be used as the default for:
- New messages
- Replies and forwards
These defaults are configured separately. This lets you use a complete signature for new conversations and a shorter version for replies.
Only one signature can be the default for each message type for a given identity. Selecting another default replaces the previous selection.
Use a signature while composing
When you compose from the identity, Kurrier inserts the relevant default signature. The composer lets you preview the selected signature and switch to another signature or remove it before sending.
Changing the signature in one draft does not change the identity's saved default.
Troubleshooting
A rule is not matching
Confirm that the rule is enabled and remember that all filled criteria must match. Temporarily remove one criterion at a time to identify which condition is preventing the match.
A rule applies unexpected actions
Review other enabled rules for the same identity and compare their priorities and criteria.
A signature does not appear
Confirm that the signature is assigned as the default for the type of message you are composing, or select it manually from the composer.
A signature looks different after delivery
Email clients apply their own rendering rules. Simplify the formatting, use common font sizes, and avoid oversized images or excessive spacing.
If the issue continues, contact Kurrier Support and include the affected identity and a screenshot without sensitive message content.